This was written for Stash Manicure, but I wanted to share it here as well. I hope you enjoy!
Those that visit my blog know that Halloween is my absolute favorite holiday. In fact I have Halloween decorations up year round! The funny thing is, I never actually made myself a Halloween quilt. I have been collecting Halloween fabric for 2 years, but because it is my favorite holiday, I always felt it had to be the perfect quilt. This year I decided to change that and I ended up making two Halloween quilts. One of them is an applique quilt called ‘Don’t Drink and Fly’.
Applique gives you a great opportunity to use up all those scraps you have hanging around. I am a lover of scraps. Many of my scraps come from other people, for which I am very grateful. I prefer to work with other people’s scraps as it gives me a larger variety of scraps than I could ever come up with on my own. Not too long ago, I organized my scraps by color.
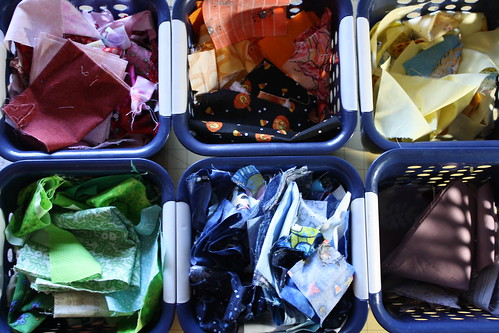
I have considered mixing up the color and organizing them by size, but since doing applique, I have found the color method to be the best one. You can see that I am a little slim on some colors, I am always on the hunt for a new set of scraps to refill my buckets!
The ‘Don’t Drink and Fly’ pattern is from Eat Cake Graphics and is available in my shop here.

If you have never seen their quilt patterns before, be sure to check them out. They are so much fun!
When I received this pattern, I had never done applique before. I tested a few different methods, and found most of them to be too time consuming for me. I finally decided to use raw edge applique for this quilt. The pattern calls for needle turn applique, so I had to be careful about getting everything facing the right direction when I made the quilt with raw edge. Today I am going to give you a quick tutorial on how I did raw edge applique for this quilt top. Since my quilt top is already done and I didn’t take any process pictures with it, I will be making a small wall hanging instead.
Tools
Steam a Seam Lite 2

Sharp scissors
Light box or Sunny Window
Iron
Pencil
Fabric requirements
All fabric can be found in your stash! That’s what is great about applique, the pieces are small, and you can easily use scraps you have hanging around. When I am done the tutorial I will show my completed quilt top and the one from the pattern, you will see that I changed a lot of the colors to fit the scraps I had on hand. I was also able to find a large piece of fabric I could use for the background, again a bit different from the pattern, but it works and it got that fabric out of my stash!
Step One
The first thing you want to do is prepare your background. My wall hanging will have a solid background and a border. I chose two fabrics from my stash for this.

You want to iron your background fabric really good, I prefer to use starch, but it is not necessary. Having an unwrinkled background will make laying out your pieces much easier.
Step Two
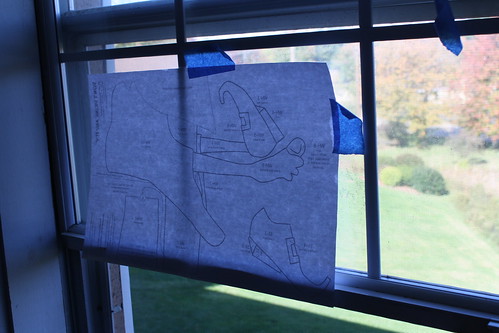
Once your background is pressed you want to trace the basic layout of the pattern to the background fabric. When I did my original quilt I just taped the pattern right side up to my window, but you could also use a light box if you have one.
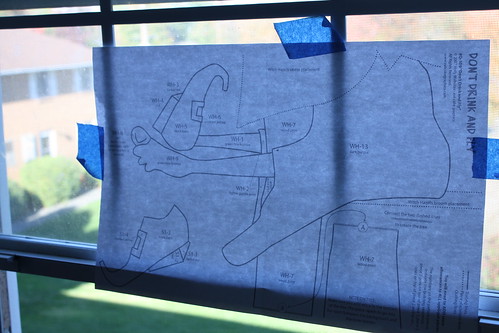
Next tape your ironed background fabric over the pattern, face up. Be sure to center everything right where you want it to go. For my wall hanging I am only doing a small portion of the pattern, but for a full quilt design, you will want to trace everything now to ensure that it is all centered properly.
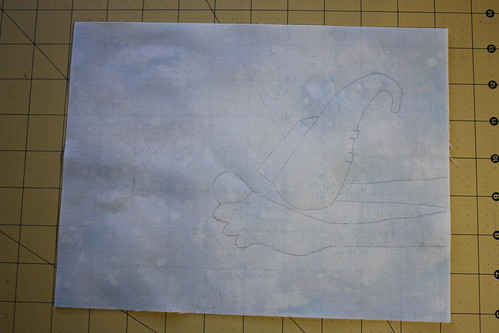
Trace your pattern to the front of your background fabric using pencil. You only need to trace enough lines to get an idea for placement of your pieces. Remember, some of the smaller detail parts will be on top of other pieces, so a placement line on the background would not help much.
Step Three
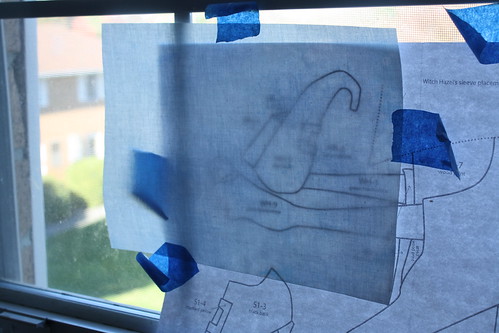
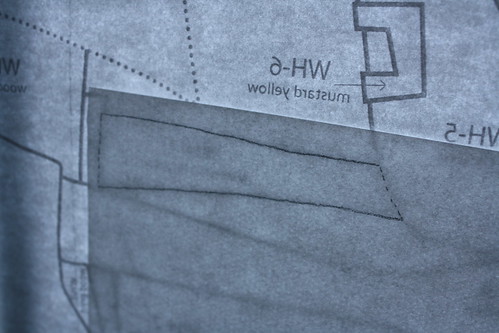
Next we want to get our pattern traced onto the Steam a Seam Lite 2. With Steam a Seam, the material gets ironed to the wrong side of the fabric, because of this we need to reverse the pattern before we draw our lines on the Steam a Seam. If we do not, we will end up with a mirror image of our pattern and nothing will fit with the background lines we just drew.
The first thing I do is turn over my pattern taped to the window. Now the pattern is taped with the back facing out. This gets me my reverse image I need to trace.
Now you can just trace each piece of your pattern on to the Steam a Seam. For the edges that are supposed to look like the are under another piece, draw a dotted line on that edge. For all the edges that are supposed to look like they are on top, draw a solid line. When placing the pieces on the Steam a Seam, you want to leave about a 1/4 inch next to any dotted lines, you do not need to leave much space next to solid lines.
Step Four
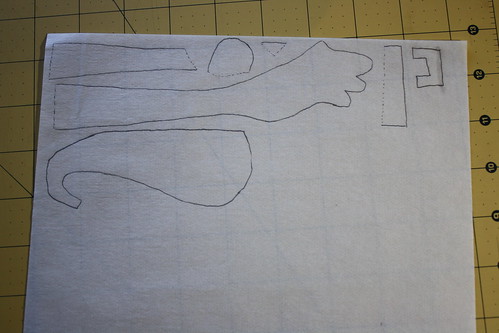
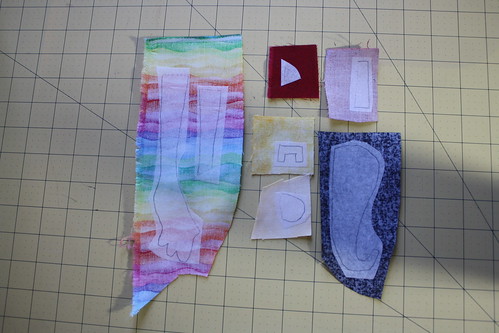
Now that you have your pieces traced, you want to pull scraps for each piece.

Iron all your pieces nice and flat (again I personally use starch). Then rough cut each pattern piece out from the Steam a Seam Lite. I do not cut on the lines yet, leave a little edge around the whole thing, and a little more than 1/4 inch next to the dotted lines.
Now peel the paper that does not have your pattern on it from the Steam a Seam Lite and iron it to the wrong side of your chosen scraps according to the package instructions.
Step Five
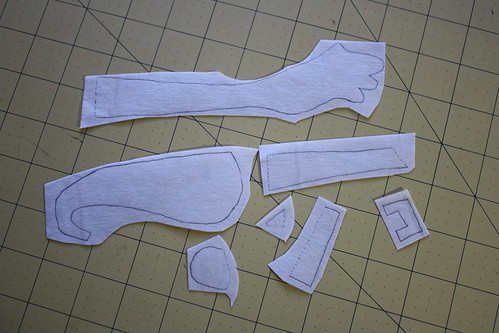
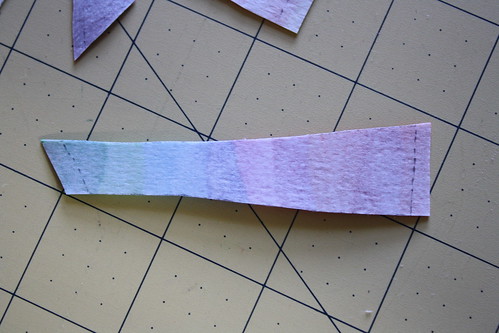
Now that your pattern pieces are ironed to the back side of your fabric, you want to cut them out. When cutting, you want to cut directly on the solid lines, and you want to leave about a 1/4 inch edge on the dotted lines. This will help you tuck these pieces under other ones.
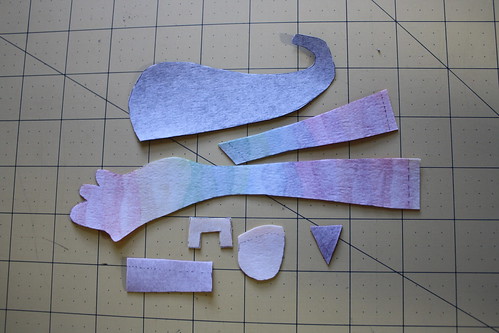
Here’s a close up of one of the pieces so you can see the extra bits next to the dotted lines.
Step Six
Now we need to get our pieces on to our background fabric. Lay out your background fabric, find each piece and peel off the paper from the Steam a Seam Lite, and place the piece on the background.
Do not iron it on yet.
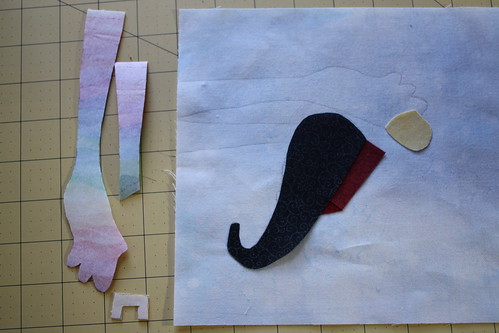
The Steam a Seam has a little tack to it, so your pieces will not slide around. Place each piece on according to your drawn guide. Keep in mind pieces that should be over and under each other, and remember that you have a little bit extra on the pieces that should be under something else, so those edges will not line up with your guide exactly. Use your pattern as a visual while you are doing this. Since the pieces are not ironed on yet, you can move the pieces around, or trim a few things, until you get the look you want.
Step Seven
Once all your pieces are in place as you like them, iron everything down. Remember you cannot undo this! So be sure everything is as you want it before you iron.
Now you can add your borders and finish your top as you would like.
I hope this tutorial helps you do a raw edge applique quilt. This type of applique is very quick and easy. Once you have your top complete, you can sew around the edges of each piece with invisible thread or like colored thread to tack everything down. I have not done this yet on my quilt.
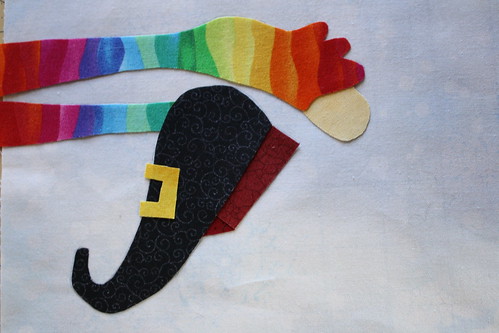
Here is a picture of the ‘Don’t Drink and Fly’ quilt from the pattern:

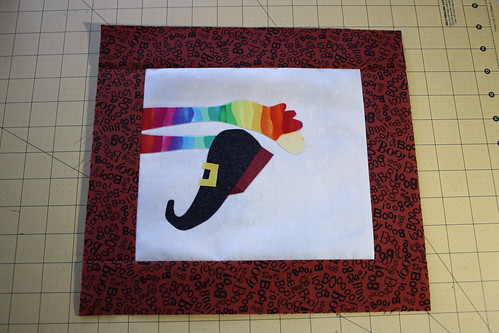
And here is my version of this quilt:

I have not done all the details on this yet, but you can see that many of my fabric choices are different from the pattern. This is because I wanted to use the scraps I had on hand. I did not have to buy a single piece of fabric to make this top! Applique is a great way to trim down your stash, I hope you will give it a try.
If you are looking for more applique patterns, I sell my own at my Etsy shop, Scrapendipity Designs.
Happy Quilting!
Rachel

Hee hee! LOVE that toe sticking out of the sock! What fun! 🙂
Great tutorial! I love busting my scrap stash, too! Thanks for showing us this!
I just found you blog on the quilting board. I really like your blog. I have been around quilting all my life but never tried it until last year. I like making lap, stadium and crib quilts. I use a large hoop I hold in my lap to hand stitch the quilt. I would love to learn more about quilting so I will be checking your blog out for advice.
If you would ever be interested in being a guest host and maybe doing a turorial I would love to have you as a guest. God Bless You and Yours, Patricia
http://itsabouttimemamaw.blogspot.com/